Cleaning a Boxer’s Ears After Cropping
Bringing home a Boxer puppy with freshly cropped ears can feel like a daunting task, especially when you're suddenly responsible for a very particular kind of aftercare. You might feel overwhelmed by the instructions from the vet, worried about causing discomfort, or even fearful of doing something wrong and inviting infection. This guide is here to walk you through the realistic, hands-on process of cleaning your Boxer's ears after cropping, offering practical advice to ensure proper healing and minimize stress for both you and your new companion.
Navigating the Initial Aftercare for Cropped Boxer Ears
The decision to crop a Boxer's ears is a personal one, and whether you're bringing home a puppy that's already had the procedure or are preparing for it, understanding the immediate aftermath is crucial. This isn't just about aesthetics; it's about wound care and ensuring the best possible outcome for your puppy's comfort and long-term ear health.
Understanding the Surgical Site
Right after the cropping procedure, your Boxer's ears are essentially open wounds, meticulously shaped and sutured. Your veterinarian will typically apply a bandage or cup system to protect the ears and help them heal in the desired upright position. This initial protection is paramount. Beneath those bandages, the skin is tender, and the edges of the ear are stitched. It's a delicate balance between keeping the area clean and letting it heal without interference.
You might be tempted to peek under the bandages, but resist the urge until your vet gives you the go-ahead. Disrupting the initial bandage can introduce bacteria or disturb the delicate healing process, potentially leading to complications. The first few days are all about minimizing movement, allowing the initial inflammation to subside, and keeping the area dry unless specifically instructed otherwise for a particular cleaning routine. It's a period of watchful waiting, ensuring your puppy doesn't scratch or rub the ears, which can be a challenge with a typical playful Boxer puppy. Anesthesia Risk in a Flat-Faced Boxer is also a factor to consider for any surgical procedure, including ear cropping, so ensure you've discussed this thoroughly with your vet beforehand.
The Role of Taping and Posting in Healing
Once the initial bandages come off, usually within a week or so, the real work of taping and posting begins. This stage is critical for encouraging the ears to stand erect. The cleaning process you undertake is inextricably linked to this posting regimen. Each time the posts are changed, the ears must be thoroughly cleaned before new tape and posts are applied. This isn't just a quick wipe; it's a careful inspection and cleansing.
The postings themselves can sometimes cause minor irritation or trap moisture, which is why diligent cleaning is so important. Your vet will show you how to apply the tape and posts correctly, but knowing how to clean the ears during these changes is just as vital. Improper cleaning can lead to skin irritation, bacterial growth, or even infection, all of which can set back the posting schedule and prolong the healing process. Many Boxer owners find this period the most challenging, as it requires consistency and a gentle touch, often with a wiggly puppy who isn't thrilled about ear handling. The total Aftercare Costs for a Cropped Boxer will often include repeat vet visits for re-posting and advice on cleaning.
Gathering Your Essential Ear Care Toolkit
Before you even think about starting your Boxer's ear cleaning routine, you need to have all your supplies ready. Rushing to find things while holding a squirming puppy is a recipe for frustration and a less-than-thorough cleaning. Having everything at your fingertips makes the process smoother and more efficient for both of you.
Choosing the Right Cleaning Solution
The type of cleaning solution you use is critical. Your veterinarian will likely recommend a specific antiseptic or gentle cleaning solution designed for post-surgical wound care. It's important to stick to their recommendations to avoid irritating the healing skin or interfering with the sutures. Common recommendations might include a dilute chlorhexidine solution or a saline rinse. These are chosen for their antibacterial properties and their gentleness on sensitive tissues.
Avoid using harsh alcohols, hydrogen peroxide, or solutions not specifically approved by your vet. While these might be fine for minor cuts on your own skin, they can be incredibly painful and damaging to a puppy's healing ear tissue, potentially causing burning, drying, or delaying healing. You can often find these specialized ear cleaning solutions at your vet's office or through reputable online pet supply retailers like Chewy or Amazon. Always read the labels carefully and ensure it's for external use only.
Soft Tools for Gentle Application
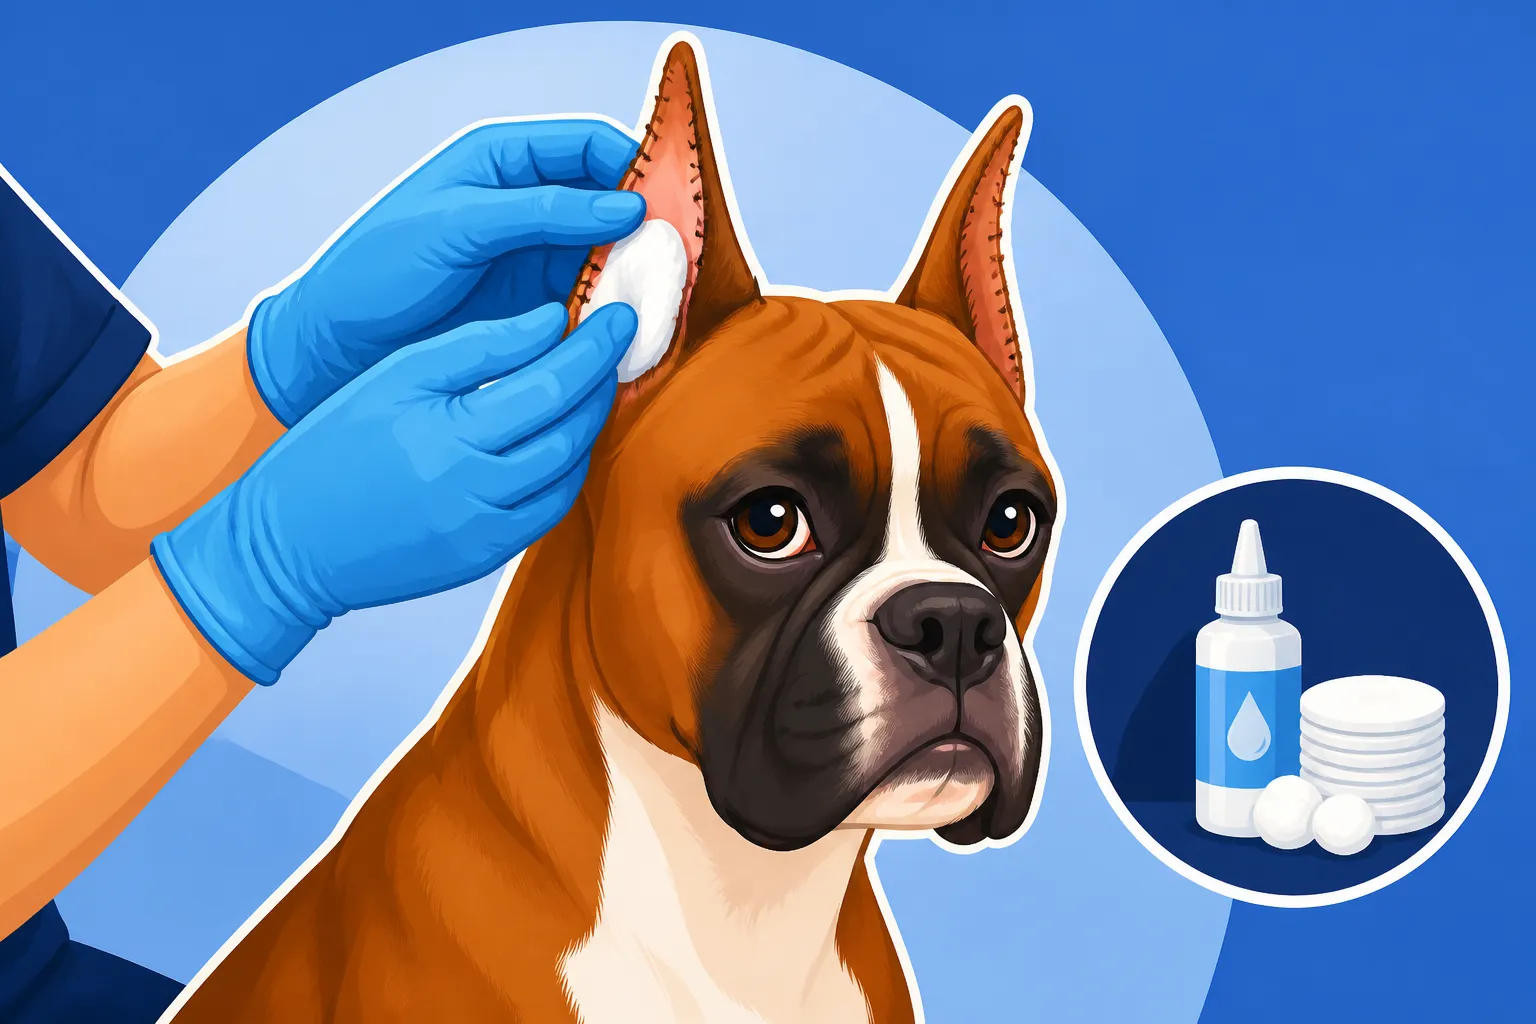
When it comes to applying the cleaning solution and gently wiping the ears, soft, absorbent materials are your best friend. Cotton balls, cotton rounds, or soft gauze pads are ideal. They are gentle enough not to scratch or irritate the sensitive skin around the surgical site, and absorbent enough to pick up any debris or excess solution.
Absolutely avoid using cotton swabs (Q-tips) directly inside the ear canal or along the delicate edges of the cropped ear. While they might seem precise, they can push debris further into the ear canal or inadvertently poke and injure the healing tissue. Instead, use cotton balls or gauze to gently wipe the visible outer surfaces and the base of the ear. For more stubborn crusts or discharge, a soft, damp cloth can sometimes be helpful, but always ensure it's clean and free of any irritating residues from detergents. Have plenty on hand, as you'll want to use fresh pieces for each ear and discard them immediately after use to prevent cross-contamination.
A Step-by-Step Approach to Cleaning
Cleaning your Boxer's cropped ears isn't a race; it's a meticulous process that requires patience and a calm demeanor. Your puppy will pick up on your energy, so approach each session with quiet confidence, making it as positive an experience as possible.
Prepping for a Smooth Cleaning Session
Before you even touch your Boxer's ears, ensure you're in a comfortable, well-lit area where you can easily restrain your puppy. A non-slip surface is a good idea if you're working on a table or counter. Gather all your supplies: your vet-approved cleaning solution, plenty of cotton balls or gauze, and perhaps a small, soft towel. If your puppy is particularly squirmy, having a helper to gently hold them can be invaluable. You might also want to have some high-value treats ready to reward good behavior immediately after the cleaning.
Take a moment to examine the ears before you start cleaning. Note any areas that look particularly crusty, red, or swollen. This pre-check helps you focus your attention and also lets you know if anything has changed since the last cleaning. Being prepared also means mentally preparing yourself for the possibility of some discomfort for your puppy. They might whine or try to pull away, but remember that this is for their benefit, and your gentle persistence is key.
The Gentle Art of Ear Cleansing
Now, for the actual cleaning. Start by saturating a fresh cotton ball or gauze pad with your vet-approved cleaning solution. The goal is to moisten the area gently, not to drench it. Carefully lift your Boxer's ear, supporting it gently at the base. With light pressure, begin to wipe from the base of the ear upwards towards the tip, following the natural contours of the cropped edge. Pay special attention to the inner surface of the ear, where moisture and debris can accumulate.
If there are any scabs or dried discharge, do not pick them off. Instead, hold a moistened cotton ball against them for a few seconds to soften them. Once softened, you can try to gently wipe them away. If they don't come off easily, leave them be and try again at the next cleaning. Aggressive scrubbing can tear fragile healing skin, cause pain, and open the door to infection. Use a fresh cotton ball for each distinct area to avoid spreading bacteria. Repeat this process until the ears appear clean and free of visible debris. Remember to be patient; this might take a few cotton balls and some reassuring words. Posting and Taping a Cropped Boxer's Ears often happens immediately after this cleaning, so ensuring the ear is completely dry is important for the tape to adhere properly.
Drying and Observing
After cleaning, thorough drying is just as important as the cleaning itself. Any residual moisture can create a breeding ground for bacteria or cause skin irritation. Use a clean, dry cotton ball or a soft, lint-free cloth to gently blot the ear until it's completely dry. Make sure to get into all the nooks and crannies without rubbing harshly. If you're planning to re-tape the ears, they must be absolutely bone-dry for the tape to stick properly and prevent skin maceration underneath.
Once the ears are clean and dry, take another moment to observe them closely. Look for any new redness, swelling, unusual odors, or discharge. Check the incision lines to ensure they are closing nicely and that no sutures have come undone. Compare both ears; sometimes one might heal faster or show more irritation than the other. This close observation helps you catch any potential issues early, allowing you to address them before they become more serious. This is also a good time to give your Boxer some praise and a treat for being a good sport!
Addressing Common Aftercare Concerns
Even with the most diligent care, you might encounter a few bumps in the road during your Boxer's ear recovery. It's natural to worry, but often these concerns are minor and manageable with the right approach.
Managing Scabs and Crusts
Scabs and crusts are a normal part of the healing process, protecting the delicate new skin underneath. The trick is to manage them gently without interfering with their natural shedding. As mentioned, never pick or forcefully remove scabs. Doing so can reopen the wound, cause pain, and significantly increase the risk of infection. Instead, use warm, moist cotton balls or gauze pads to gently soften them.
You can hold a warm, damp compress (ensure it's not too hot) against the crust for a minute or two to help loosen the dried material. After softening, very carefully try to wipe the crust away with a fresh, clean cotton ball. If it doesn't come off easily, don't force it. It simply means the skin underneath isn't ready, and pulling it off will cause damage. Consistency is key here; with regular gentle softening, most crusts will eventually come off on their own or with minimal effort. This patience is vital to prevent secondary infections and ensure the best cosmetic outcome.
Dealing with Mild Irritation
Sometimes, despite your best efforts, you might notice some mild redness or irritation around the ear edges or at the base, especially where the tape for posting touches the skin. This can be due to sensitivity to the tape adhesive, slight friction, or residual moisture. If the irritation is minor and your Boxer isn't scratching excessively, there are a few things you can try.
First, ensure the ears are thoroughly dry after cleaning and before re-taping. Sometimes, a tiny bit of moisture trapped under the tape can cause maceration and irritation. If tape sensitivity is suspected, your vet might recommend a different type of medical tape or a barrier cream (applied only to areas away from the incision, and only if approved by your vet) to protect the skin before applying the tape. Make sure the tape isn't pulled too tightly, as this can cause discomfort and restrict circulation. If your Boxer is licking or scratching the ears, an Elizabethan collar (e-collar) might be necessary to prevent them from doing further damage. Remember, mild irritation can quickly escalate into a more serious issue if left unaddressed or if your Boxer continues to scratch.
| Feature | Healthy Healing Ear | Signs of Concern |
|---|---|---|
| Color | Pink, healthy skin | Bright red, inflamed, dark purple/black |
| Swelling | Minimal, mild at edges initially | Increasing, firm, hot to the touch |
| Discharge | None, or clear/very slight watery discharge | Pus-like (yellow/green), thick, bloody |
| Odor | None | Foul, sweet, or distinctly unpleasant |
| Pain | Mild sensitivity to touch, tolerable handling | Intense pain, yelping, head shaking, pawing at ears |
| Scabs | Thin, dry, gradually flaking off | Thick, moist, oozing underneath, not softening |
| Behavior | Normal activity, minimal ear focus | Lethargy, loss of appetite, persistent head tilting |
Recognizing Red Flags and When to Seek Veterinary Help
While some irritation is normal during the healing process, there are definite signs that indicate a more serious problem requiring immediate veterinary attention. Don't hesitate to contact your vet if you observe any of these red flags; early intervention can prevent complications and ensure your Boxer's well-being.
Signs of Infection and Inflammation
An infection is perhaps the most serious complication of ear cropping aftercare. If you notice any of the following, pick up the phone and call your veterinarian without delay. Watch for increasing redness that spreads beyond the immediate surgical site, and significant swelling that feels hot to the touch. This isn't just a bit of puffiness; it's a pronounced, warm swelling that suggests inflammation and potential infection brewing.
Another major red flag is pain. While some sensitivity is normal, if your Boxer is yelping, pulling away aggressively, or showing extreme discomfort when you try to clean their ears, it could be a sign of infection or significant inflammation. Watch for persistent head shaking, pawing at the ears, or rubbing their head against furniture or the floor. These behaviors indicate that your dog is experiencing considerable irritation or pain. An infection won't just go away on its own; it requires professional diagnosis and treatment, often involving antibiotics.
Unusual Discharge or Odor
Healthy healing ears should not have any significant discharge. You might see a very minimal, clear, watery fluid in the immediate days post-op, but anything beyond that is cause for concern. If you notice a discharge that is thick, yellowish, greenish, or pus-like, it is a strong indicator of bacterial infection. Bloody discharge that is not related to a recent, accidental bump or scrape is also worrying.
Perhaps the most unmistakable sign of an issue is a foul or unusual odor emanating from the ears. Healthy ears, even healing ones, should have very little smell. A strong, unpleasant, sweet, or yeasty odor almost always signals an infection. This smell can be subtle at first, so lean in close and give those ears a sniff during your cleaning sessions. Don't ignore these sensory clues. If you detect any of these signs, your vet needs to see your Boxer promptly to assess the situation and prescribe the appropriate treatment. Addressing these issues early will prevent more severe pain and prolonging the healing process.
Maintaining Lifelong Ear Health for Your Cropped Boxer
Once your Boxer's ears are standing proudly and the healing process is complete, the diligent aftercare doesn't suddenly stop. While the intensity lessens, ongoing ear hygiene remains a crucial part of your Boxer's general health routine.
Ongoing Hygiene Once Ears Stand Erect
Even after the posting phase is a distant memory, regular ear checks and occasional cleaning should become a habit. Cropped ears, by their nature, have better airflow than natural, floppy ears, which generally reduces the risk of moisture and yeast buildup, and can contribute to Why a Cropped Boxer Gets Fewer Ear Infections. However, they are not entirely immune to issues. Dust, dirt, and even tiny bugs can still find their way into the ear canal.
Once a week or every other week, take a moment to visually inspect your Boxer's ears. Look for any redness, wax buildup, or changes in the skin. A simple wipe with a vet-approved, general ear cleaning solution (different from the post-surgical one, your vet can recommend an appropriate maintenance cleanser) on a cotton ball can help remove any superficial debris. Remember to only clean the visible parts of the ear. Never insert anything deep into the ear canal. This proactive approach helps catch any potential problems before they escalate. It also reinforces good behavior for ear handling, which is useful for vet visits.
Protecting Against Environmental Irritants
Boxers are active dogs, often found running through fields, playing in dog parks, or enjoying a good romp outdoors. All these activities expose their ears to environmental irritants. While cropped ears are less prone to issues like grass seeds getting trapped deep inside compared to floppy ears, they can still collect dust, pollen, or small debris.
After a particularly dusty walk or an adventurous play session, a quick visual check and a gentle wipe can prevent minor irritants from becoming larger problems. If your Boxer enjoys swimming, always ensure their ears are thoroughly dried afterwards, as excessive moisture can still lead to problems even with increased airflow. Consider using dog-specific ear wipes, which you can find on sites like Chewy or Amazon, for quick clean-ups after outdoor adventures. These are designed to be gentle and effective. For more general health, remember that a Boxer's short coat means Why a Boxer's Short Coat Shows Every Rash applies to the skin anywhere on their body, including the ears, so vigilance is always a good idea. By consistently incorporating ear care into your routine, you'll ensure your Boxer enjoys healthy, clean ears for their entire life.
Disclaimer
This article is for general informational purposes only and does not constitute professional advice. Laws, prices and regulations vary by location and change over time. Consult a qualified professional for guidance on your specific situation.